Food Services San Diego - How to Carve a Pumpkin Instructions
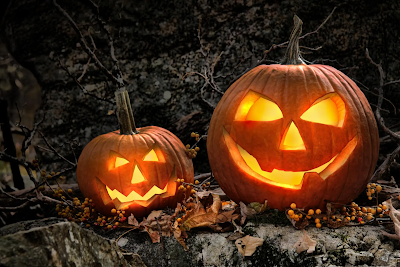
What would Halloween be without a carved pumpkin sitting on your porch or at the window looking out at all the trick or treaters? Make this Halloween special by carving your own pumpkin.
Tools and Materials you will probably
use:
- Pumpkin
- Keyhole saw
- Plaster scraper or
fleshing tool
- Sharp awl, needle
tool, T pin or thumbtack
- Miniature saw
- Linoleum cutter
- Petroleum jelly
STEP #1: Choose pumpkin. Choose a pumpkin that’s large and
smooth with a stem of at least 2”. If you plan to put a candle inside, choose a
ground that’s at least 9” tall.
QUICK TIP: Pumpkins with smaller stems
rot quickly.
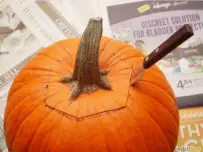
STEP #2: Draw circle or hexagon. Draw a circle or hexagon on the top of
the pumpkin an inch or two below the stem. Don’t worry if it’s not perfect, but
make sure it’s a little bigger than your fist.
STEP #3: Carve through pattern (circle
or hexagon). Carve
through the pattern with a sharp knife or the keyhole saw – this requires less
force, and is therefore safer. Angle your cut so the top of your circle is
wider than the bottom, which will ensure that the top fits snugly in place.
STEP #4: Remove top & clean out. Using the plaster scraper or fleshing tool, remove the top and clean out the pumpkin’s seeds and stringy membranes with a scooper. Continue scraping the inside until the walls are about half an inch thick – otherwise it will be hard to carve.
After you scoop out and carve your
pumpkin, dip it in a large container of bleach and water (use a 1 tsp: 1 gal
mix). The bleach will kill bacteria and help your pumpkin stay fresh longer.
Once completely dry, (drain upside down), add 2 tablespoon of vinegar and 1
teaspoon of lemon juice to a quart of water. Brush this solution onto your
pumpkin to keep it looking fresh for weeks.
QUICK TIP: For a delicious – and
healthy – treat, wash and sprinkle the seeds with salt and
then toast them in the oven on a baking sheet
STEP #5: Draw face. Draw the eyes, nose and mouth – or any
other pattern you want If you use a template, tape template to pumpkin. Trace
design onto pumpkin by poking holes with the awl, needle tool, T pin or
thumbtack.
STEP #6: Cut through pattern. Use a miniature saw or knife to cut
through the pattern you’ve just drawn. Remember that cuts that connect to each
other will remove the entire piece in between, so cut around anything you want
to stay intact, like teeth or a wart on the nose. Use the linoleum cutter to
carve details into just the surface of the pumpkin.
STEP #7: Make cuts & scrapes. Make disconnected cuts and scrapes to
allow the light from inside the pumpkin to shine through without removing whole
pieces, a good technique for drawing outlines or scenes, or for creating more
definition in a face – like glowing pupils.
QUICK TIP: To keep the
pumpkin edges from browning before the big night, dab on a little
petroleum jelly to lock in moisture.
STEP #8: Place candle. Place a small candle and light it when
you’re ready to show your work. If there’s a large opening level with the
candle, like a mouth, light the flame through it so you don’t burn your hand.
QUICK TIP: If your flame is weak or
keeps going out, it’s not getting enough oxygen. Cut a small opening in
the top of the pumpkin, hiding from sight behind the stem.
STEP #9: Use glow stick or
battery-powered light. If
you’re not keen on having a real flame, use a glow stick or battery-powered
light.
DID YOU KNOW??? Because pumpkins
weren’t common in Europe, early Jack-O-Lanterns were made out of turnips.


Comments
Post a Comment